3D DESIGN
Designing for disassembly in order to divert waste is something USGBC talks about in their newest v5 version. Intrigued by the language and determined to understand what it meant, I began the following project:
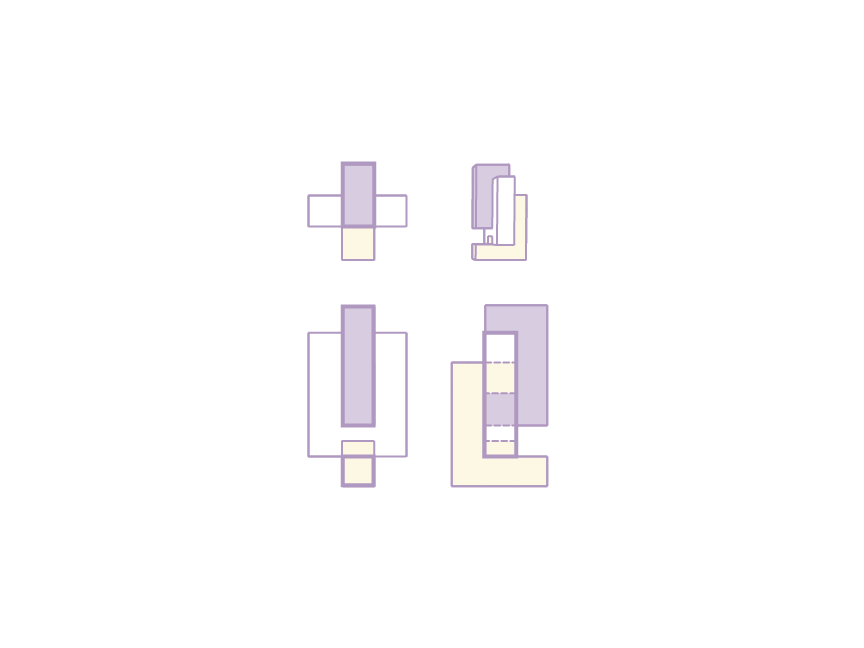
The first thing I had to do was develop a clear understanding of the word disassemble. My first thought was: to take something apart; to break it down. During this process of defining I noticed something - underneath the word lived an old, sleepy assumption - the presence of an already assembled object: disassembly’s opposite. It became obvious that I could not acknowledge one state without acknowledging the other; that these words defined each other. This observation became a starting point for my research in binary opposition as theory and the work of deconstructionist critic: Jacques Derrida.
Binary oppoisitonis
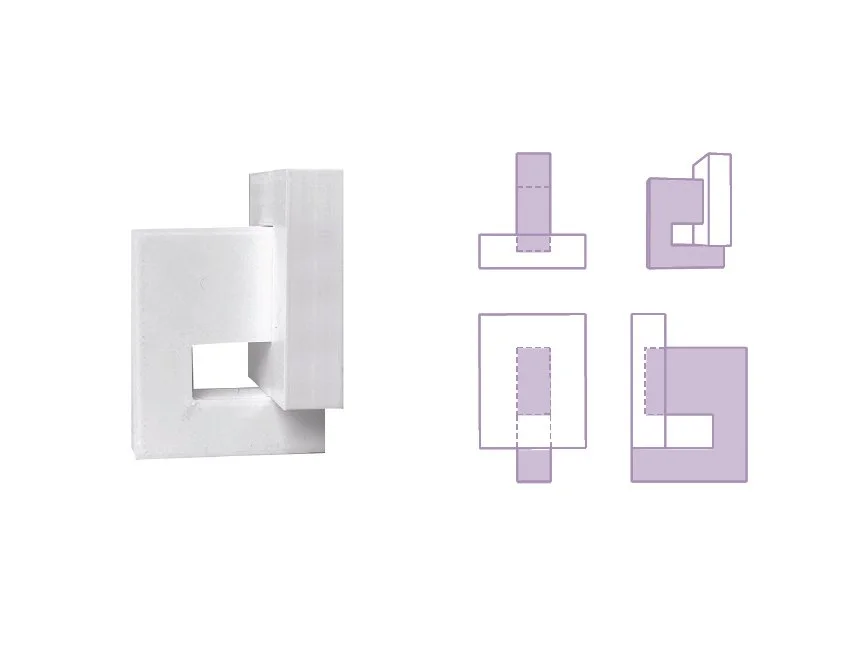
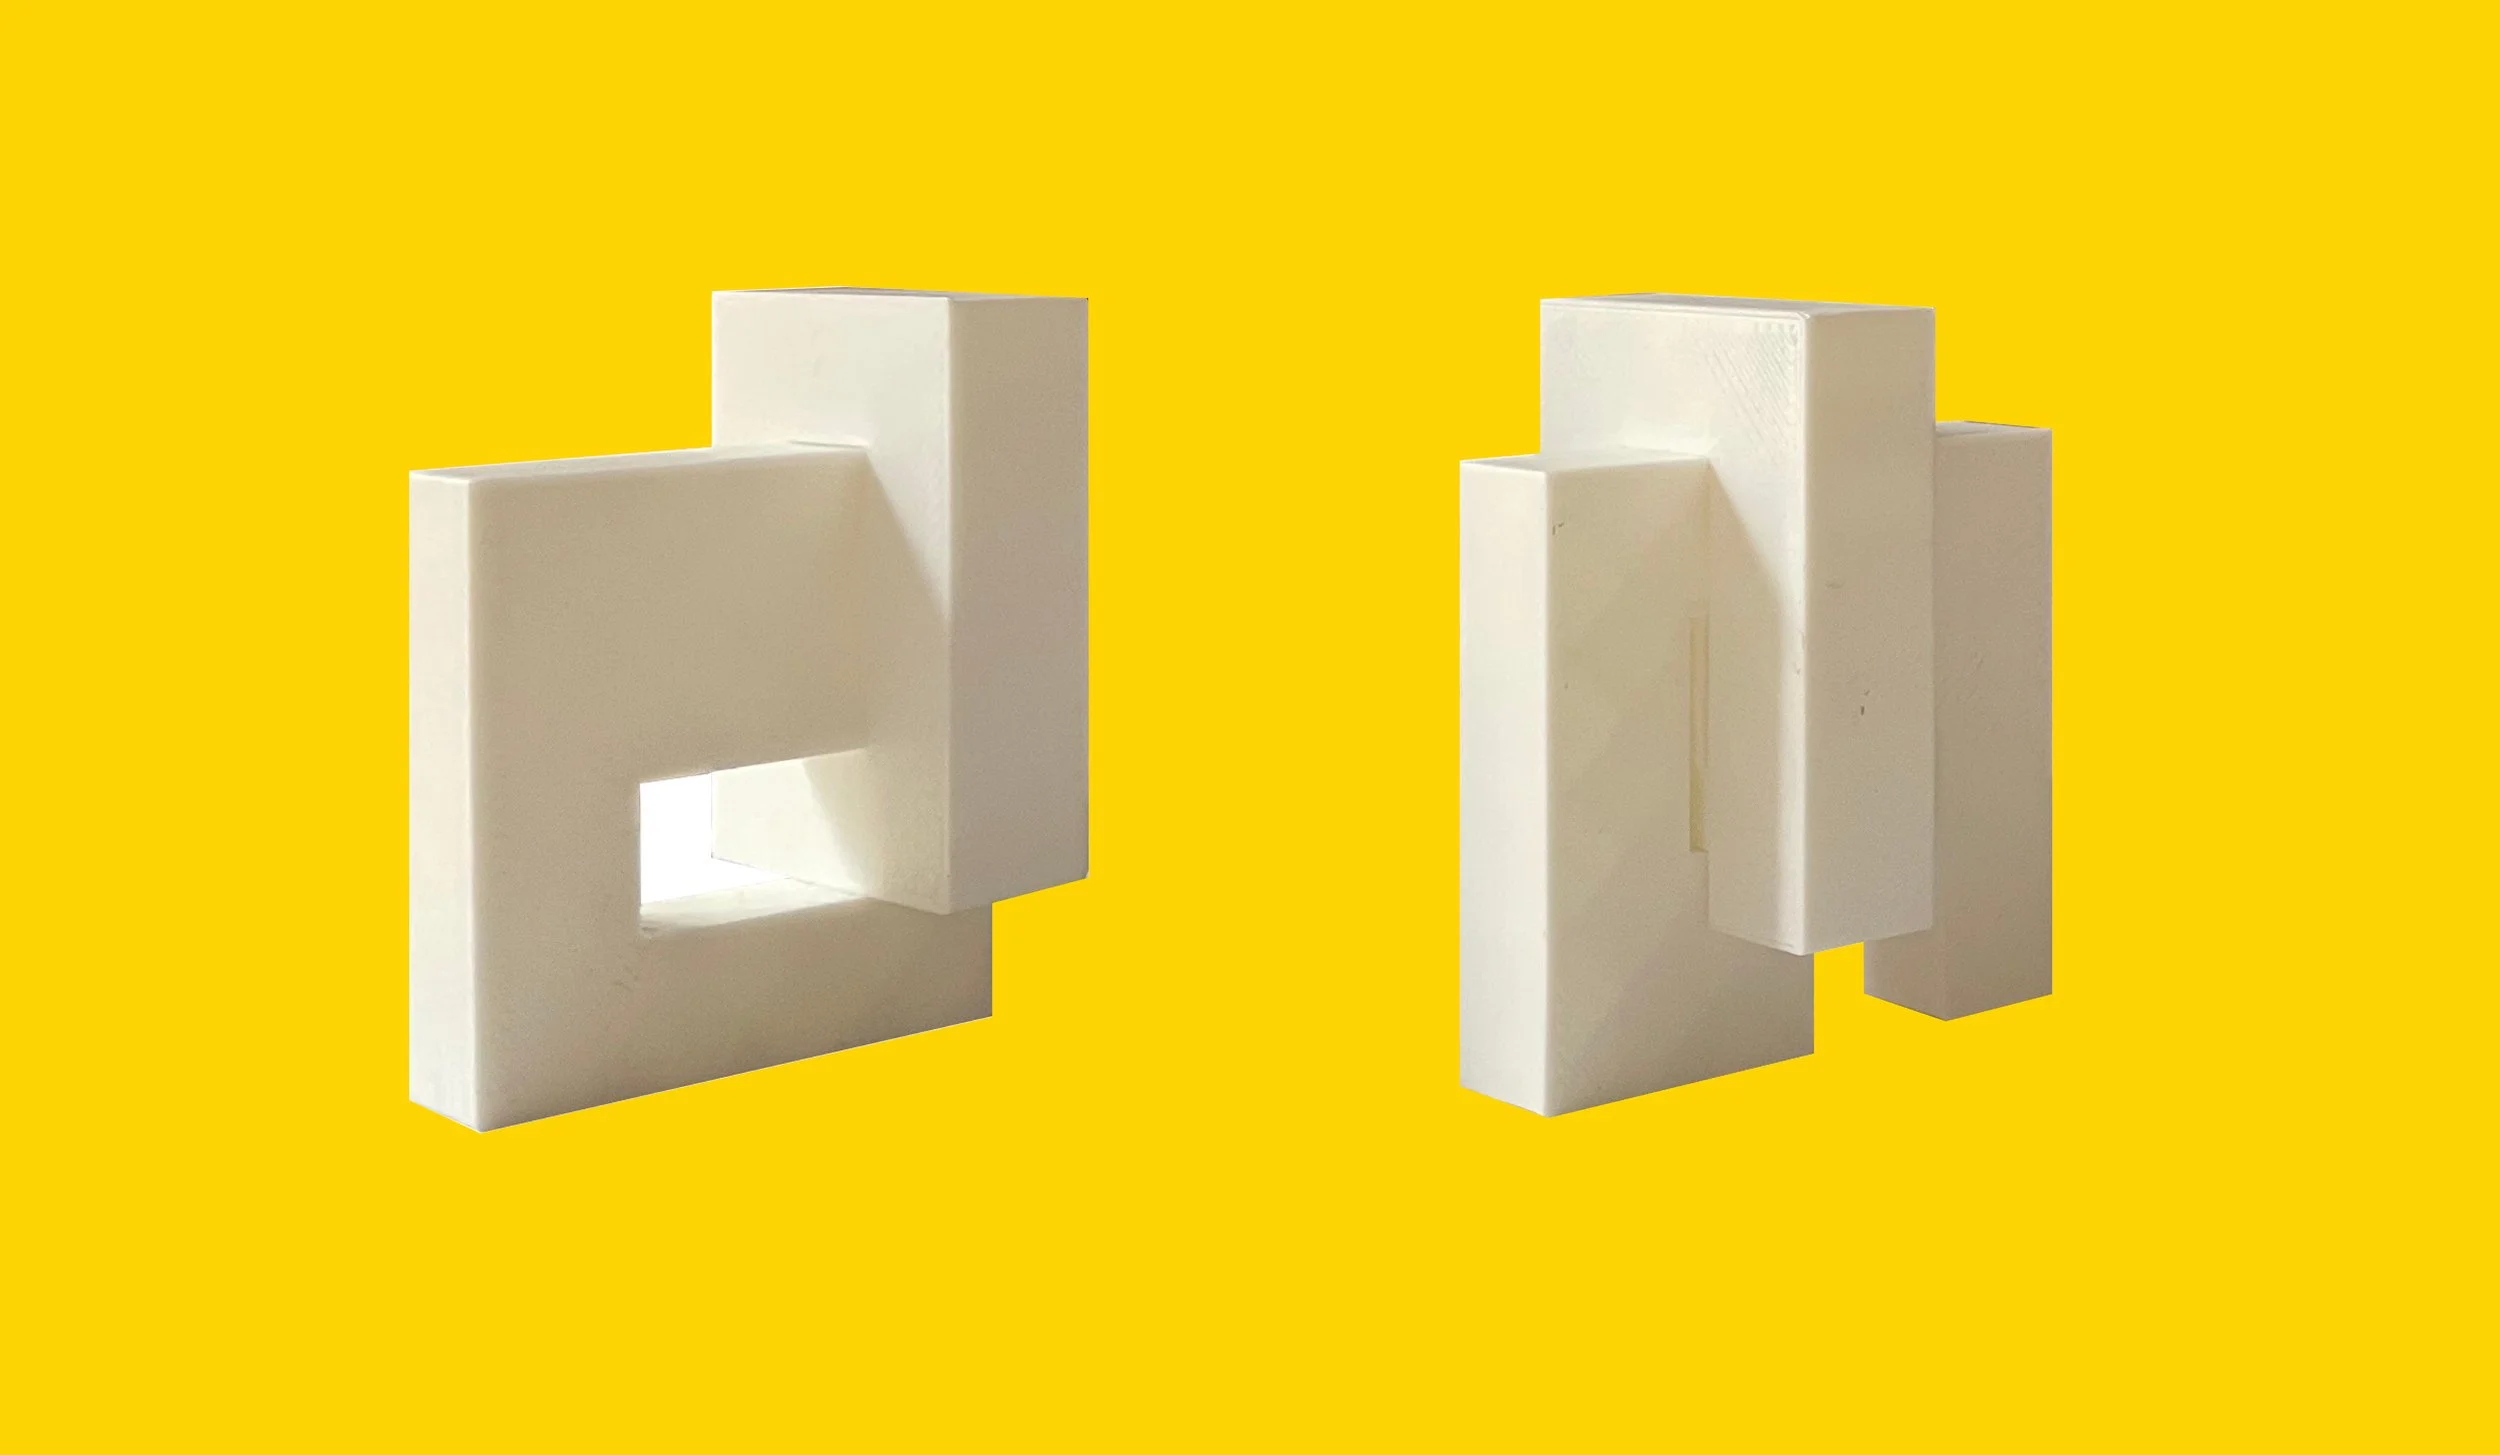
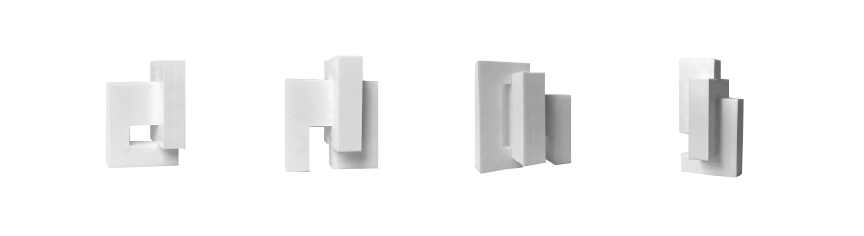
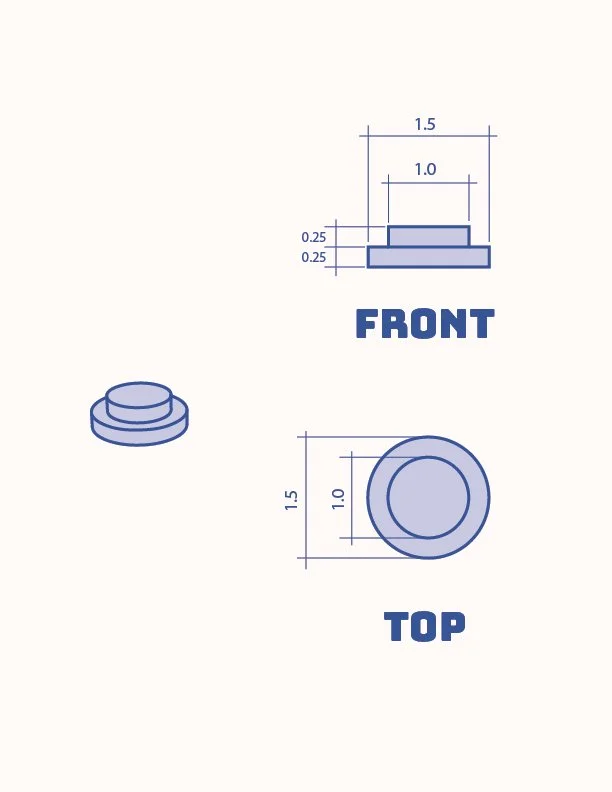
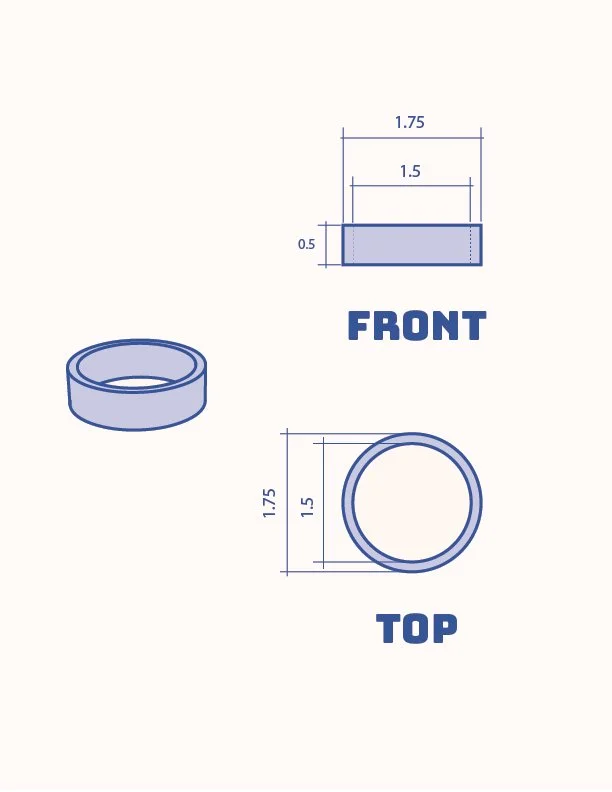
Despite the objects various components, it’s designed to look like a single, uniform massing. Each component is deliberately proportioned using a ¼” grid and designed with similar qualities: straight lines that intersect at right angles and smooth, even surfaces.
In the real world, no manufactured part is exactly the same as its digital model and getting the elements to press together tightly became a lesson in tolerance. Tolerance is defined as the maximum allowable variation in a particular dimension. Dimensions are crucial when designing objects, like this, whose parts are designed to physically connect in a way that’s neither too tight or too loose.


EDUCATION
This project is designed to introduce kids in grades 5-8 to 3D modeling and printing techniques.

This lesson was focused on building “stamps” in Tinkercad. The design, itself, is a simple two-component piece that combines primitive shapes and just a few basic commands. The lesson is designed so that kids can 1. learn to read technical drawings and 2. think about 3D printing as a tool as opposed to a complete project on its own.
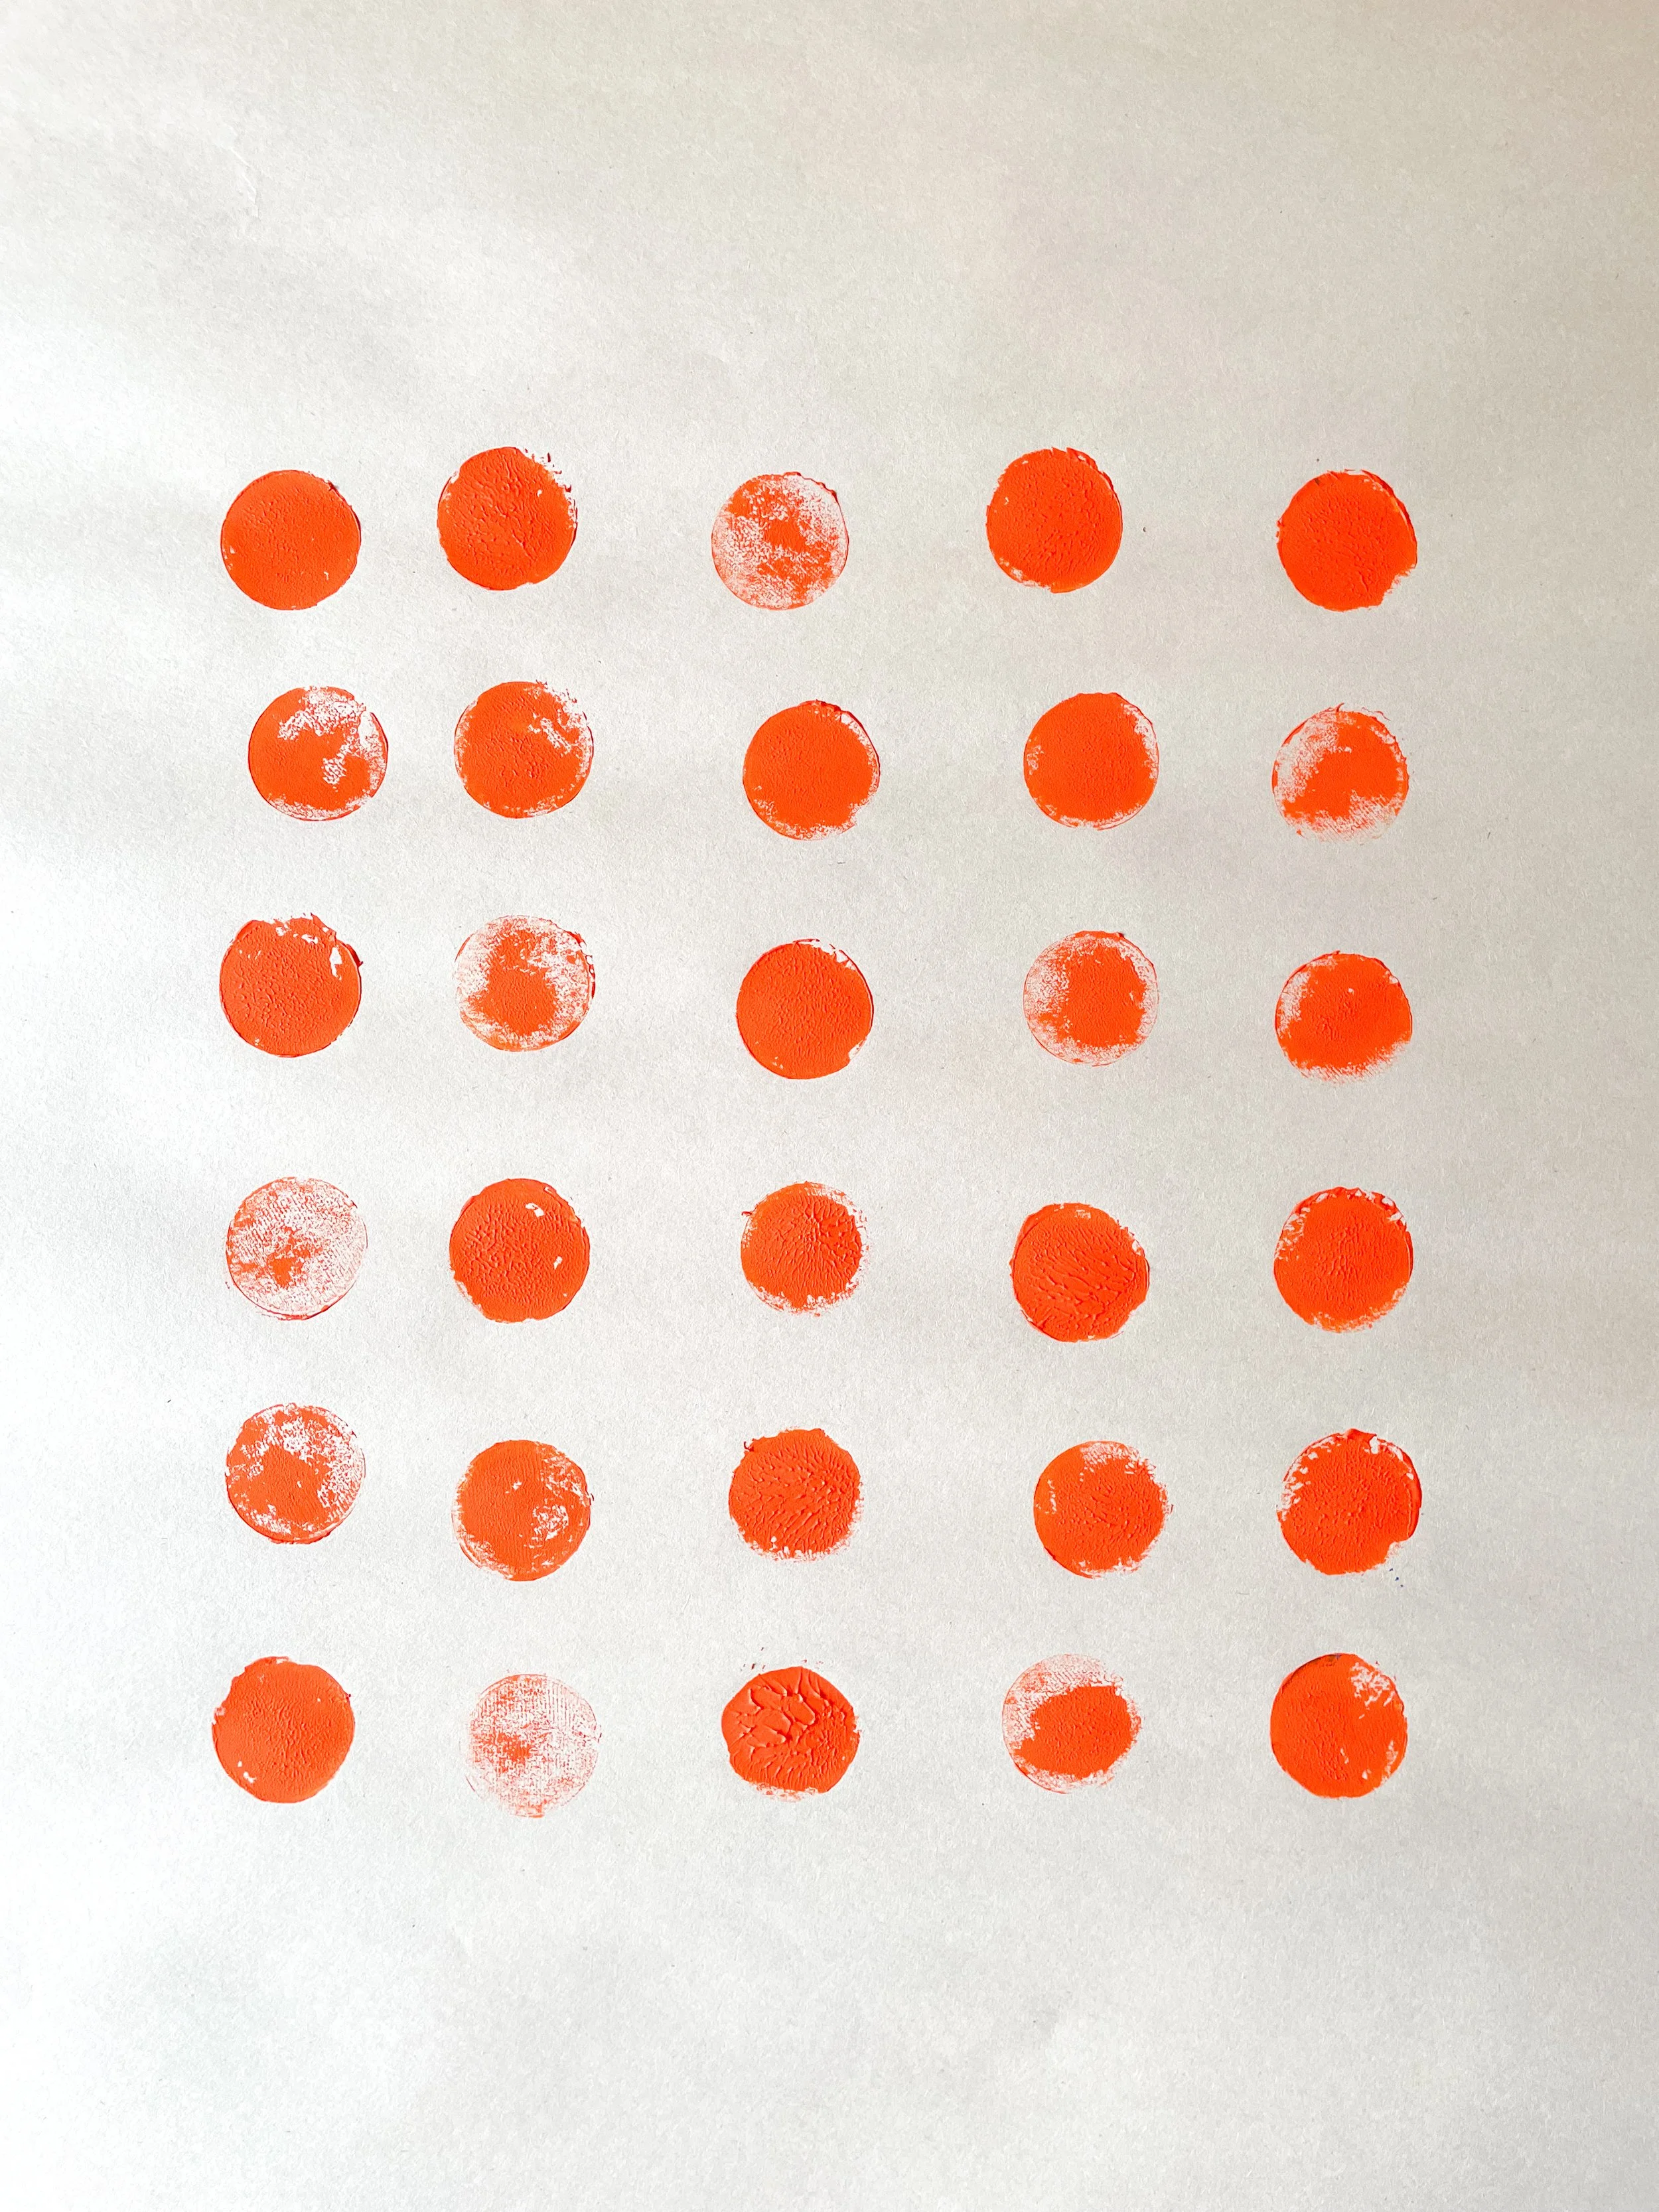
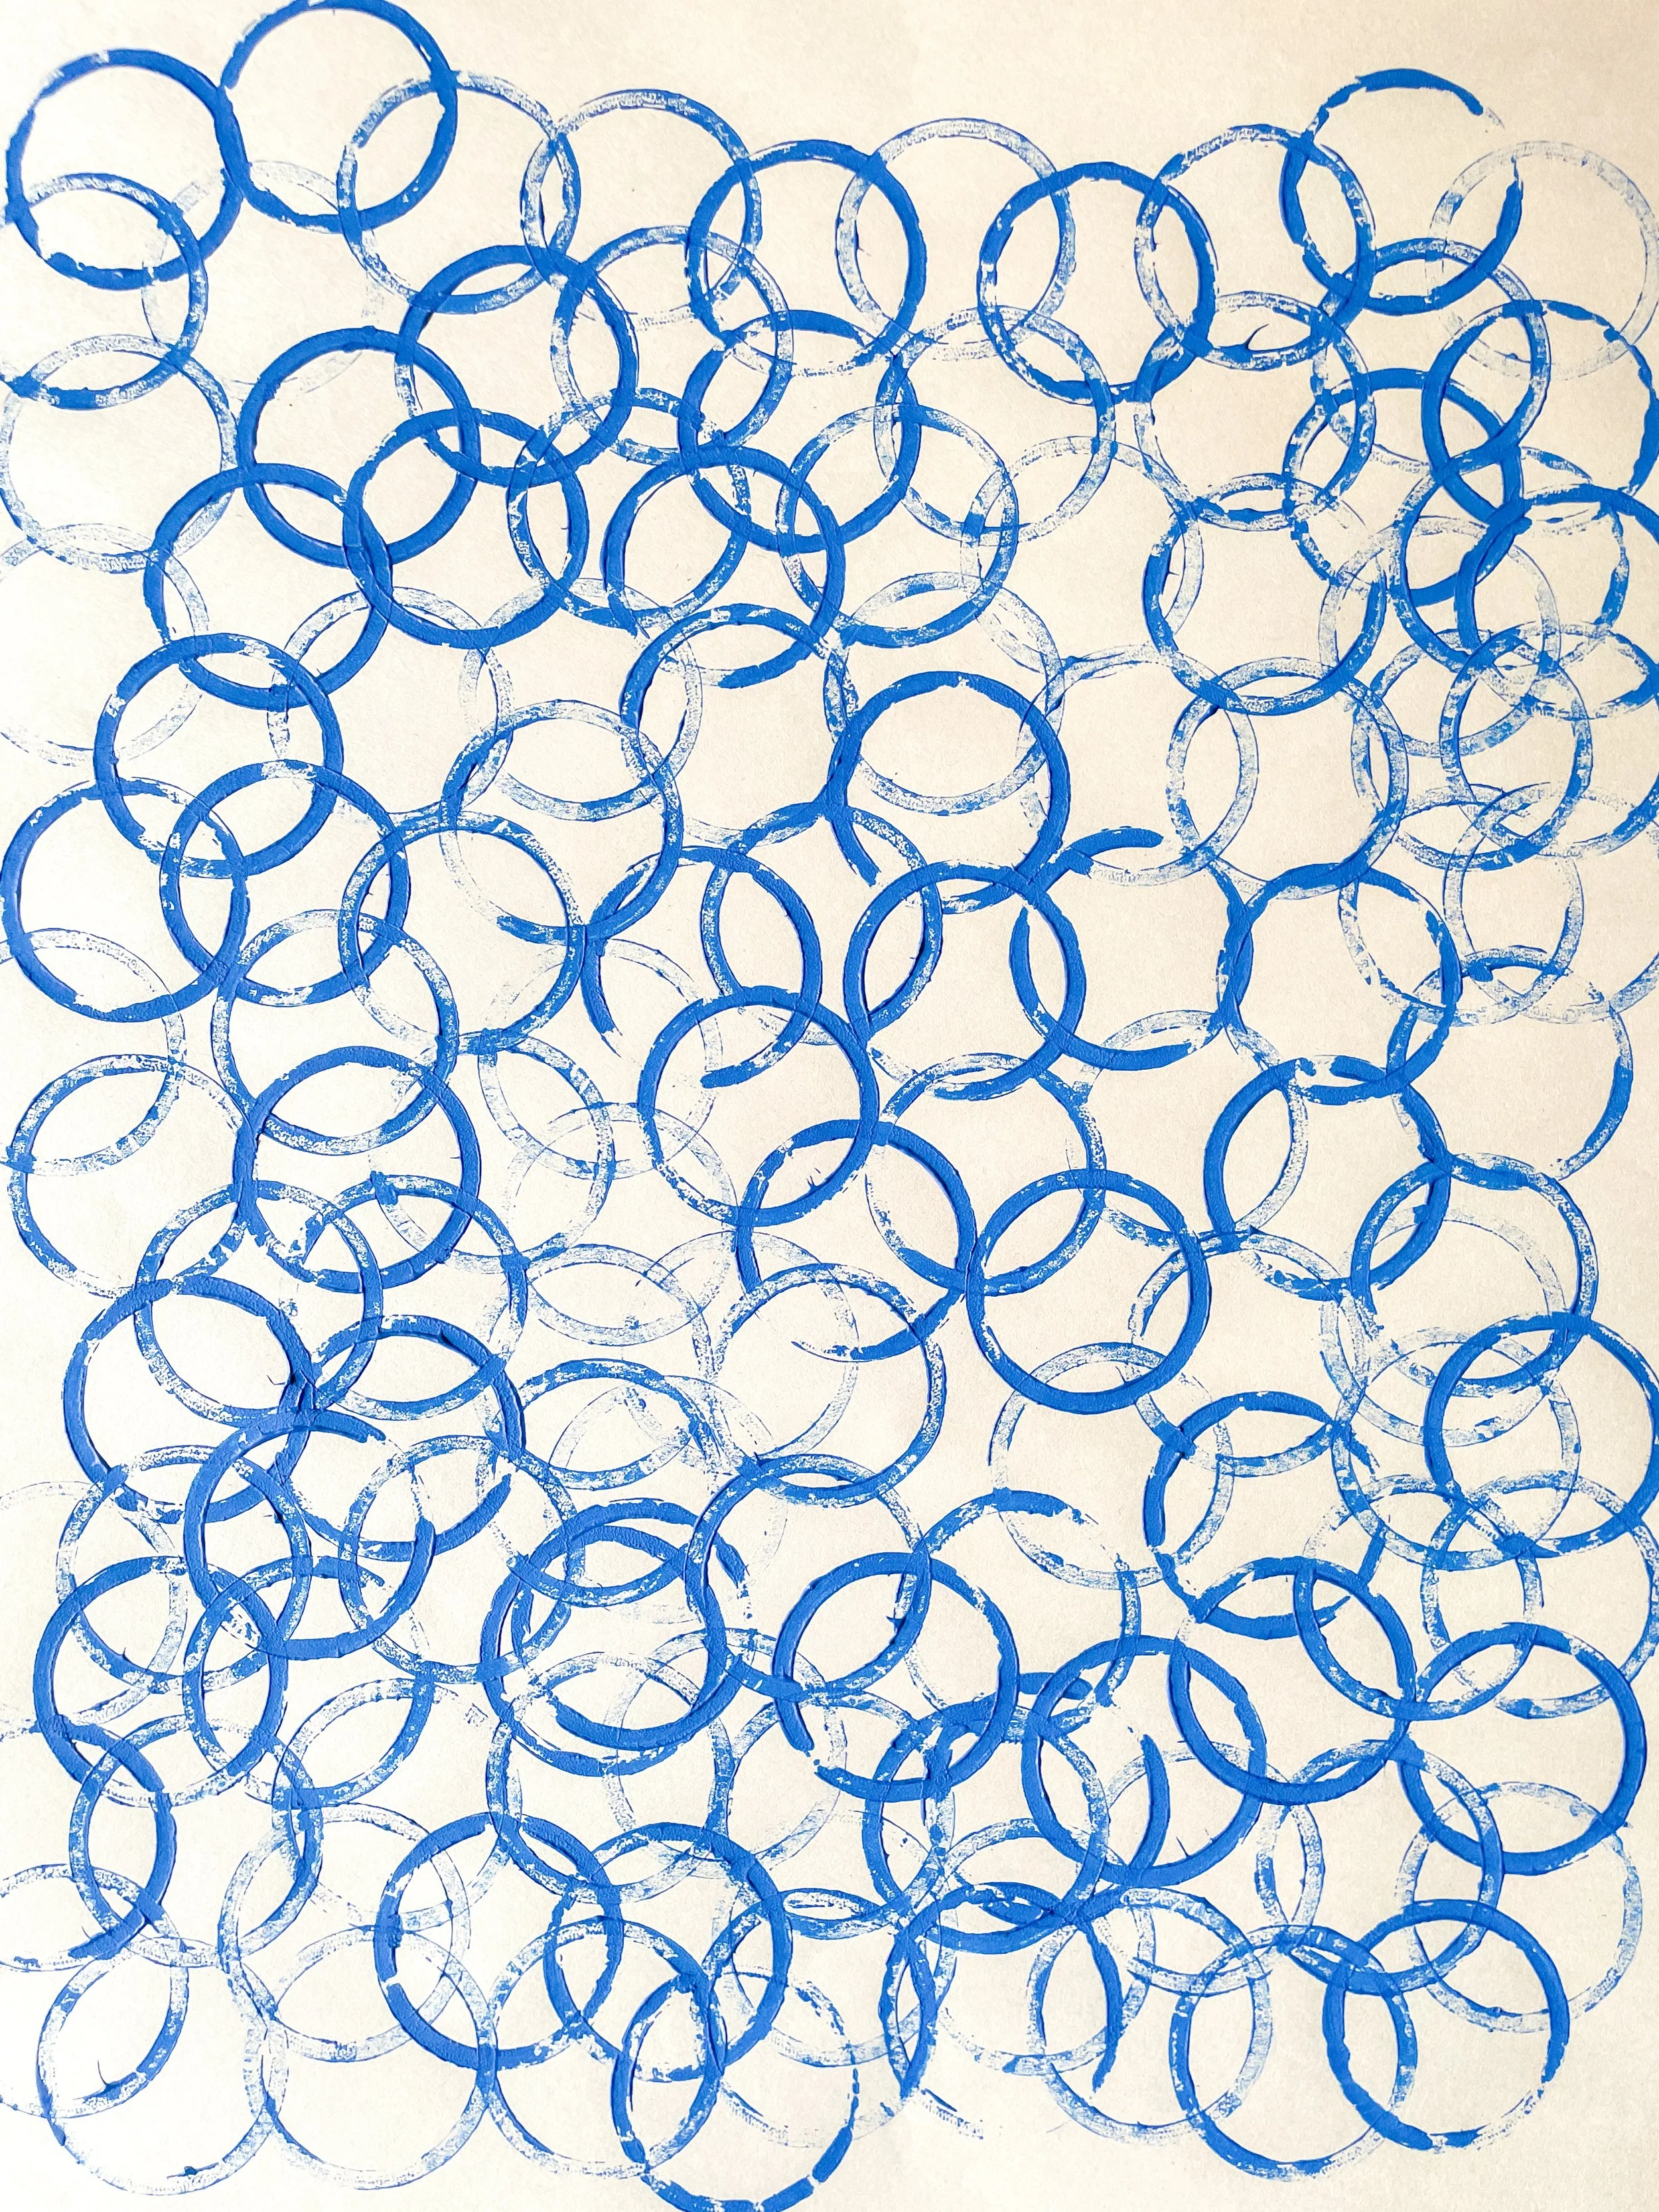
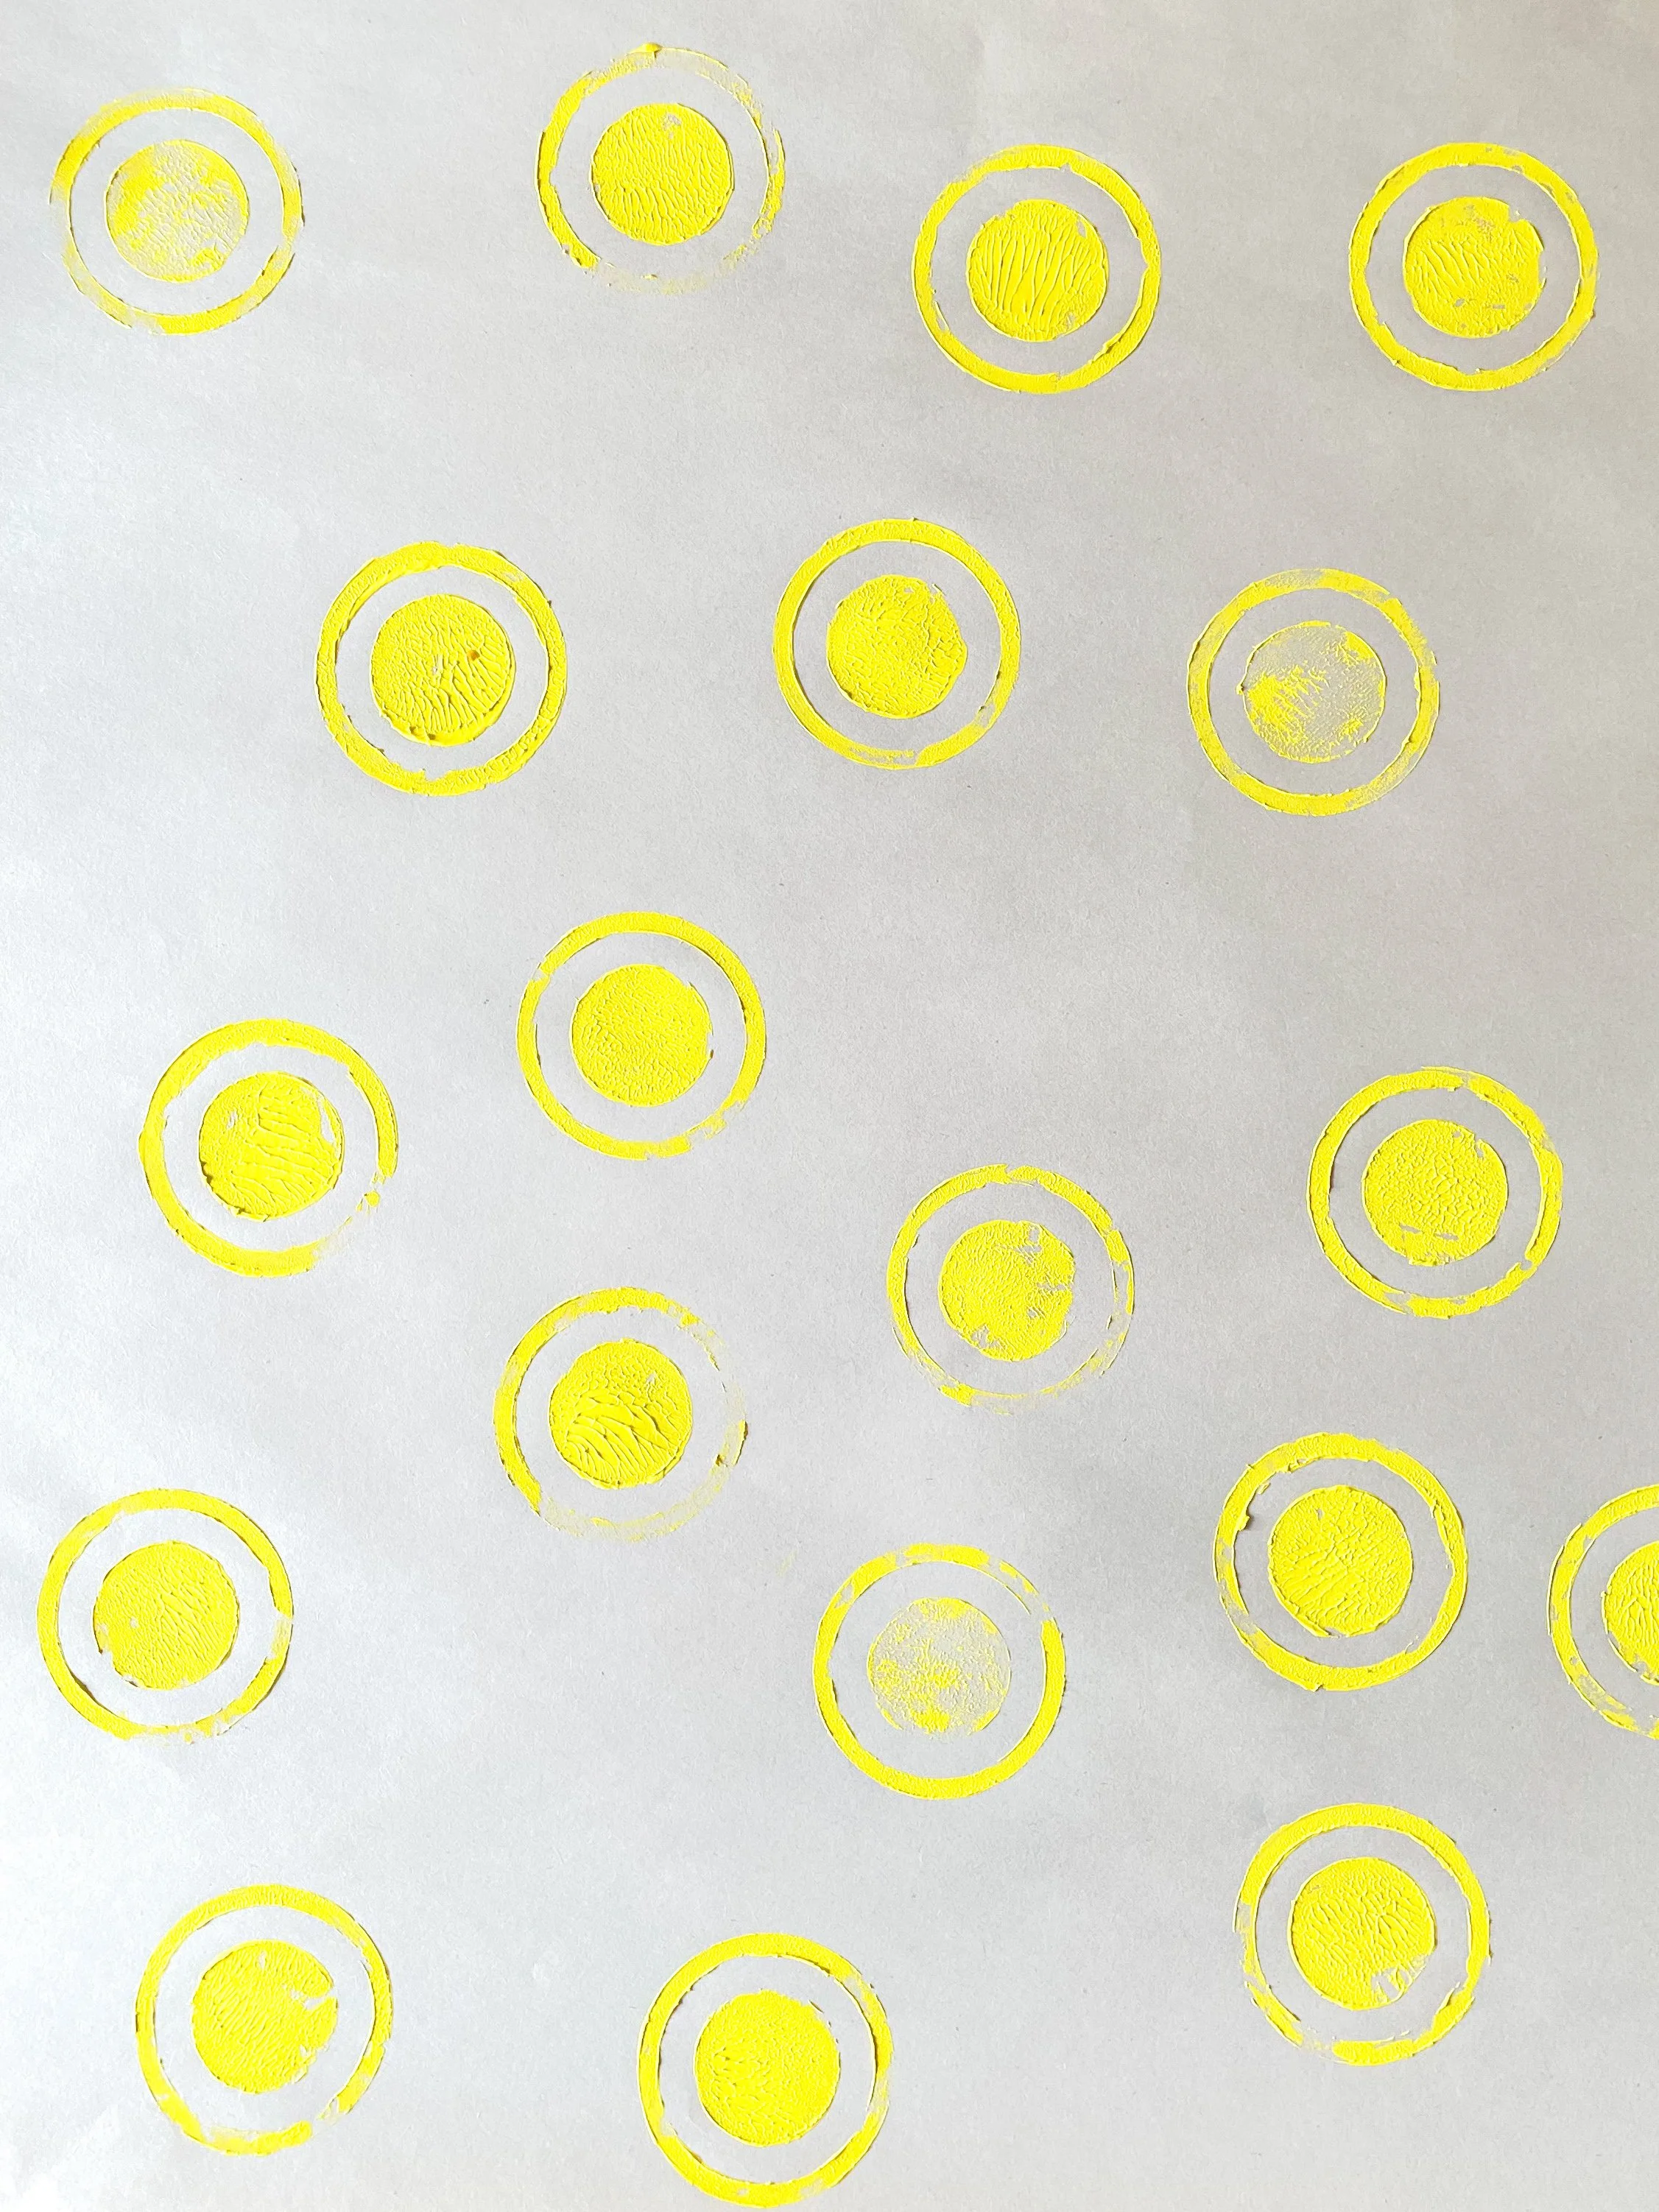
It’s important to demonstrate to kids, immediately, what the stamp’s capable of. I used block printing inks on large format newsprint to communicate this + the stamp’s versatility. The simplicity of the stamp’s design was something that was prioritized throughout the design process: I wanted the kids to notice that something can be interesting without overcomplicating the geometry of the print.
I believe that demonstrating what the print can do is the most important part of the making process when getting kids to think about 3D printing as a tool as opposed to a complete project on its own. This teaches them to design with simplicity in mind, redirecting their instinct to do “the most” right away.